RAT is very powerful for local server installs, but also works very well for rented remote servers as well.
When using RAT for remote servers, you will only use the server connection tab within the settings menu. TheServer Configuration and Local Server tabs can not be used with remote servers because RAT does not have access to the necessary server files to make the local server parts work.I am assuming you already have the latest Allocs Server Fixes and The Fun Pimps (TFP) mods installed on the server. The Fun Pimps Mod is packaged with the server, so it should be in the mods folder already. Though, for some reason, they package it in the old mods folder location. If you have added mods to the new location, you can just move the TFP mods to the new location and remove the old mods folder location.
The very first thing to do is setup your config file for RAT.
Below you will find the settings in theserverconfig.xml you will need to change.
XML:
<property name="WebDashboardEnabled"            value="true"/>
<property name="WebDashboardPort"               value="yourWebdashboardPort"/>
<property name="WebDashboardUrl"                value=""/>
<property name="EnableMapRendering"             value="true"/>

<property name="TelnetEnabled"                  value="true"/>
<property name="TelnetPort"                     value="yourTelnetPort"/>
<property name="TelnetPassword"                 value="strongPasswordHere"/>
Pro Tip:
Sometimes, server hosts have default values in theserverconfig.xml and they need to be changed to the ports they allocated to you.Usually the correct ports are listed in your host dashboard. You can change the
serverconfig.xml ports to what your host has listed and restart the server so the changes take effect.Once the changes have been made to your config file and the server is restarted so the changes take effect, you can setup RAT.
In the settings menu, click theServer Connection tab and fill in your information from the serverconfig.xml.
Once that is setup, you can exit that window and save your changes.

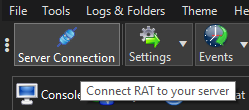
Once your settings and config file are good to go, click the server connection tab in the upper left corner of RAT and you should see RAT connecting to the server in the console tab.

The telnet should turn green almost immediately and the Web API light should turn green in a few minutes.

